|
My husband went on a guys-only camping trip this past weekend, so I put my son to bed early, cracked open a can of Dr. Thunder, and took over the bedroom and kitchen for a wild night of Crash Course Economics, ironing, and rotary cutting. Fast forward fifteen episodes, and you can see the results: three sets quilt and burp cloth pieces, ready for stitching. 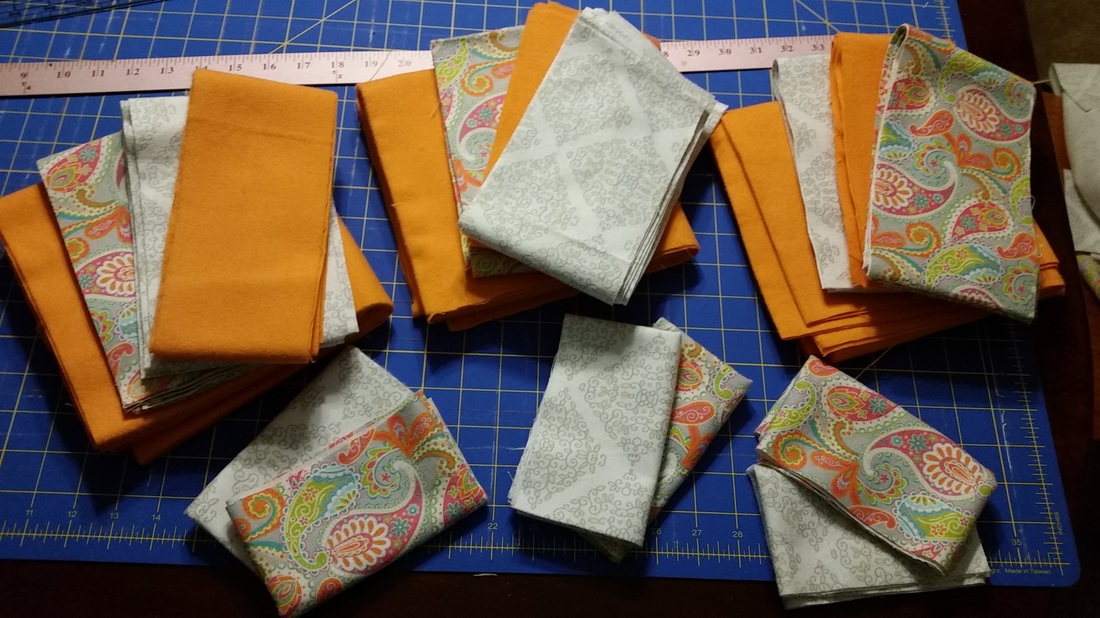 I have a bit of leftover fabric, as seen here. It may seem like a big pile but it is actually a lot less than I usually have, so I have succeeded in purchasing/using materials more effectively. I can either toss these scraps (and not feel too bad in doing so) or perhaps use them to piece together little loveys to include in the set. I'll think about it. 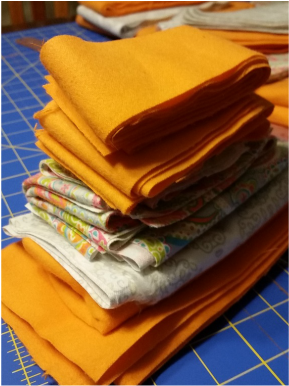 Unfortunately, it was not as easy or as quick to get these cut as I was hoping. Particularly because I did not really account for factors like motivation [lack thereof], energy levels [lack thereof], and a sore back from bending over awkwardly. Finding a different time of day (not 2am) may help alleviate this. The pros:
The cons:
So here's a look at the process I came up with. Lesson 1. Measure and iron together. You don't need to mark the fabric if you can use the crease instead. When fabric comes off the bolt, it is already folded in half so that it measures 21" wide (I'm working with 42" wide fabric.) Since I want my cut to be 31", I went ahead and ironed out that natural crease. Then I folded over one edge of the fabric 15.5" in and pressed that seam. For the backing piece, I went ahead and took this edge all the way down the 3-yard length of the fabric.  You can see the pressed edge and how the fabric comes partway across (15.5" across, to be exact.) You can also see the uneven edge (on top where the edges don't line up.) This is where the fabric store cuts from the bolt, and they are notoriously NOT straight. My next task is to square up this edge. I used my husband's handy dandy T-ruler thingamajigger (that's the scientific term for it.) Eventually I figured out that this wasn't necessarily any more helpful than my regular yard sticks and rulers. Lesson 2. Measure twice, cut once. Not really a new lesson, but I was being very careful since I knew I had virtually no room for mistakes with the backing. My first cut was along that uneven edge to square up the fabric. VERY important to get this actually square, otherwise it will mess up pretty much every other cut that comes after. Second cut was along that 31" line created by the overlap. Since the fabric is 3 yards long, I didn't make this one single cut all the way across. Once I passed the 31" mark, I made a perpendicular cut to remove an entire 31"x31" square. Then I picked up where I left off along the length of the fabric and repeated two more times for a total of 3 31" squares. The pieces left over would become my 9 3.5"x31" strips: 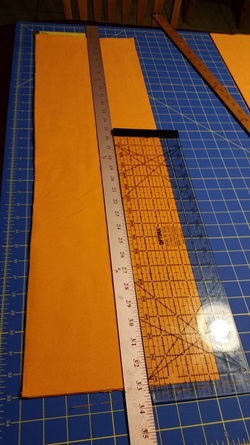 Lesson 3: Two rulers make a match. That doesn't really make any sense, but this is perhaps the most useful trick that I picked up for the night. My clear ruler is super handy for measuring out the stripes, BUT since I am right handed I couldn't use my rotary cutter on its left side. So I just got my yard stick and butted up flush against the clear ruler and VOILA. No. Don't ask me why I just didn't measure from the left side of the fabric and skipped the need for this double-ruler thing altogether. There was a reason, I just can't remember. After that, I pretty much repeated with the two patterned fabrics, except skipping straight to the 31" by 4.5" strips. The burp cloths are a little more flexible, but ended up being 21" long and about 7-8" wide.  There you go. I started from the left side on this one. HAPPY NOW??
4 Comments
3/7/2016 03:11:38 pm
I love those colors. I can't wait to see how these turn out.
Katie Johnson
3/7/2016 03:41:40 pm
Looks like you are making great progress! I am glad you are learning new and more efficient ways to do things. I bet you could share what you have learned on Pinterest or some other avenue online - does Etsy have forums where crafters talk shop?
Daydree
5/20/2016 09:39:56 pm
Yep, there are sellers groups for just that kind of thing.
Kendal
3/8/2016 08:37:54 am
I love reading your posts! They truly make me laugh out loud at certain points. Leave a Reply. |
What is a 20% Project?One of the reasons why Google comes up with the most innovative new technologies is because they allow their employees one day a week (or 20% of their paid time) to pursue their own passions: to work on ANY development that they want. Click to set custom HTML Follow Daydree's board 20% Project on Pinterest.
Archives
May 2016
Categories |
 RSS Feed
